Printing Tip: How To Print To Edge Of Paper

Picture this...
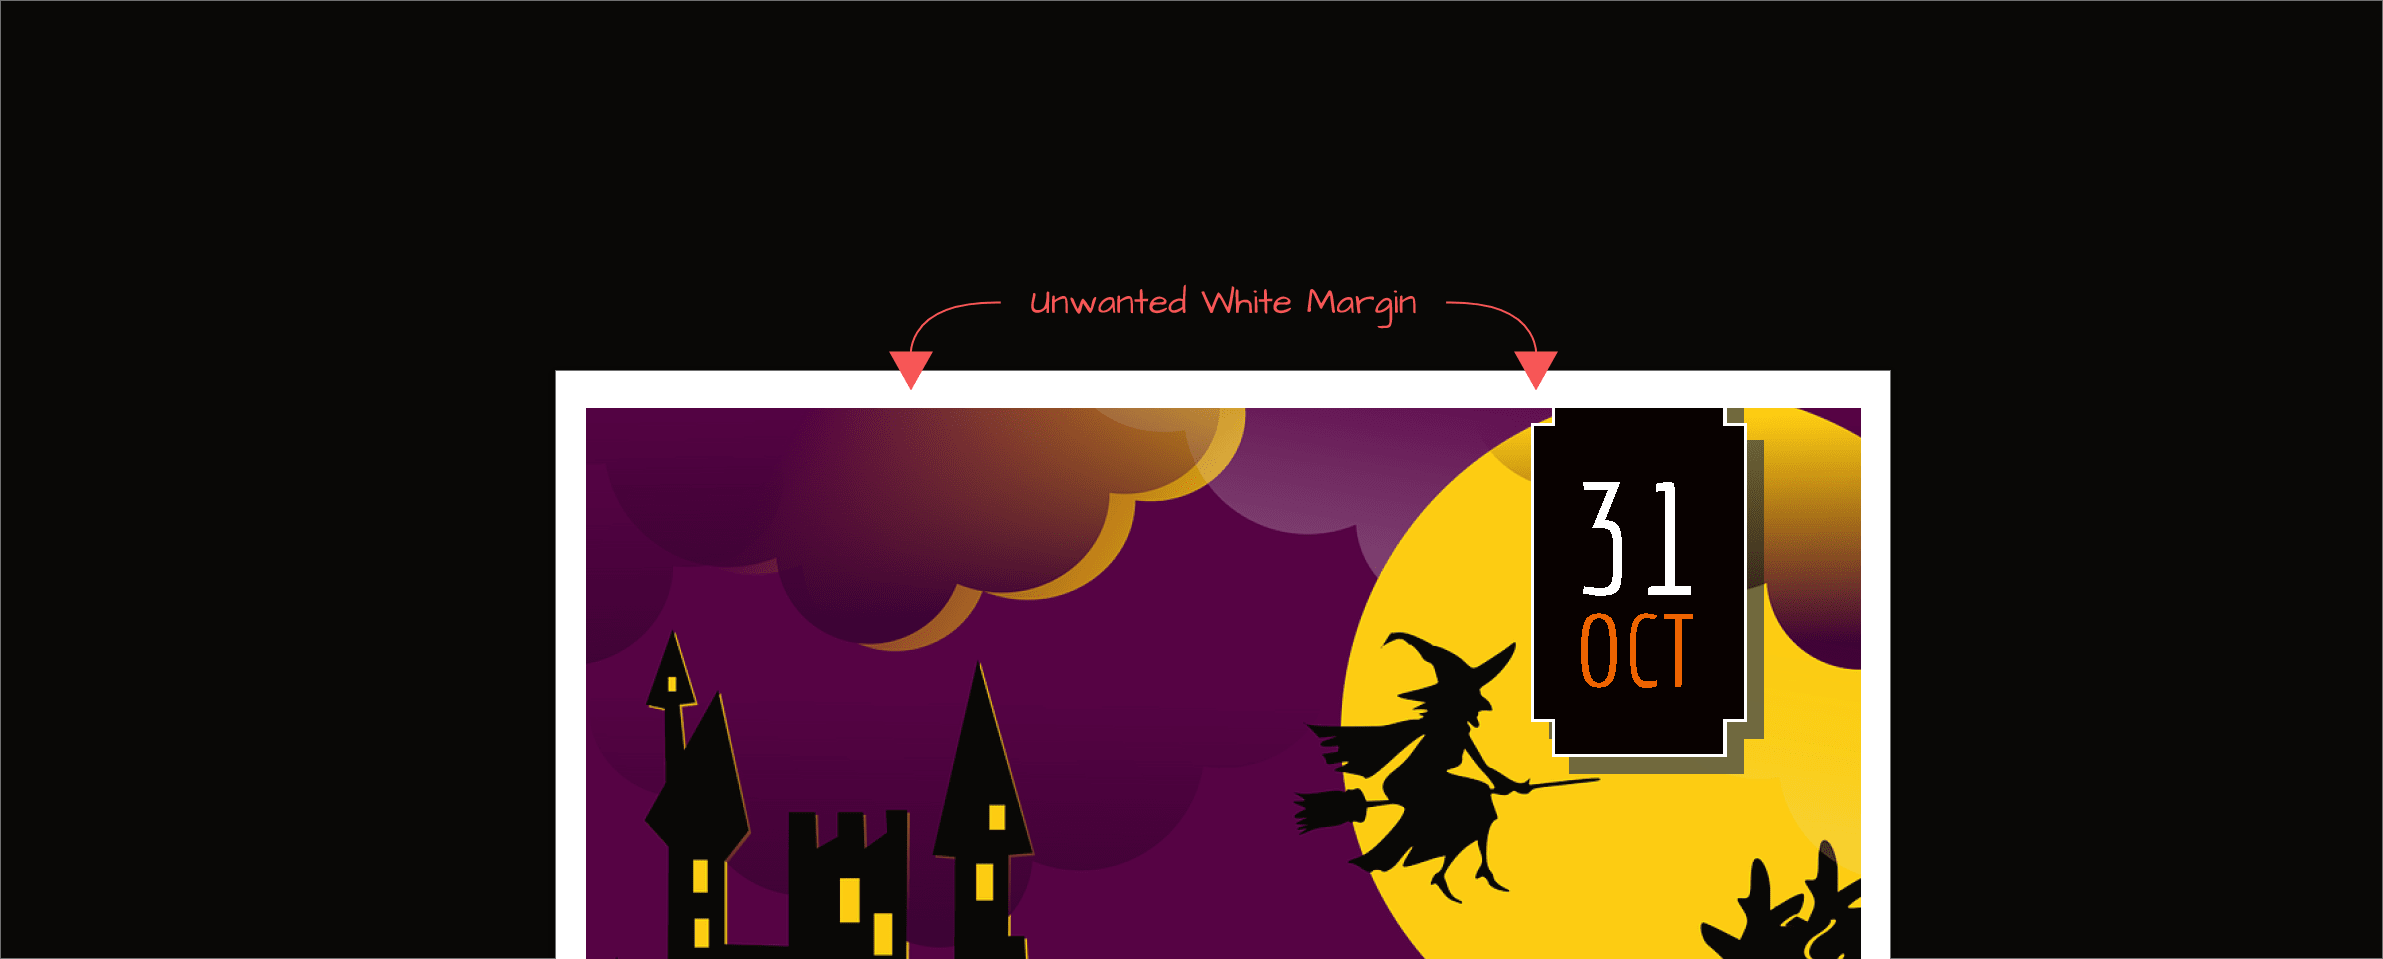
You ve used one of MyCreativeShop s customizable templates to create a beautiful piece of print marketing magic - a flyer to beat all flyers, a brochure beyond the rest. You decide to handle the printing yourself on your company s trusty in-house printer. You hit print - but what s this? Why is your masterpiece surrounded by an unwanted white border on all sides? How will you ever be able to successfully print your project yourself?
What s the deal?
When you create a project in our online editor, your on-screen design extends to the edge of each side of the page. However, most home and office printers are not automatically set up for borderless printing in the same way a commercial printer is. As a result, your design will not print all the way to the edge of the paper unless your printer is both capable of borderless printing and properly set up to perform the task. To remedy this, we ve provided the basic steps to enable edge to edge printing for some of the biggest printer manufacturers. (Psst...when you order prints directly with MyCreativeShop, we handle all of this for you!)
Thoughts before beginning:
- Verify that your printer is capable of borderless printing and can handle the paper size needed before committing to DIY-ing your project.
- Always print a test page before launching a full run. Confirm that your test print meets your standards before giving the go-ahead.
- Specific borderless print setup steps may vary by printer model and operating system, so always double-check with the support page on your manufacturer s website.
A note about paper types and page sizes We could give you a long list of paper types and sizes that work for borderless printing. For most home and office printers, the borderless print option is intended to allow for photo printing. Because of this, common photo sizes are often available for borderless printing (4x6, 5x7, 8x10, etc.). Some printers are also capable of printing larger sizes, such as 11x14, 11x17, 13x19, 16x20, or 17x22. Check your printer s manual to confirm your options. Often, manufacturers will recommend using a paper type heavier than that you would use for everyday printing, such as photo paper or a heavyweight presentation paper. Some printers have a specific list of allowable paper types/weights. However, print capabilities vary dramatically from one model to the next, so following the borderless print setup steps below or checking your owner s manual are the best way to confirm the sizes and paper types available to you.
Go borderless to give your DIY project a professional touch.
Image by Andrew Martin from Pixabay
Borderless Print Setup Steps by OS and Manufacturer
Note: Steps may vary by model and manufacturer. Check your printer s manual or follow the links to the manufacturer s support pages for clarification.
WINDOWS
1. Brother
- Choose "Print" from the software you are using to open the "Print Dialog" window.
- From the "Print Dialog" window, choose "Properties" or Preferences," depending on your model.
- Click the "Basic" tab and check the "Borderless" box.
- Note: If the settings selected for "Paper Size," "Media Type," and "Print Quality" do not meet the criteria for borderless printing, the "Borderless" checkbox will not appear.
2. Canon
- Open the "Printer Driver Setup" window (i.e. "Preferences" or "Properties," depending on your model.
- Click on the "Page Setup" tab.
- Under "Page Layout," select "Borderless" and click OK when prompted.
- Select the "Type" from the drop-down that corresponds with your chosen paper type.
- Select the "Size" from the drop-down that corresponds with your chosen paper size.
- Use the slider to adjust the amount of extension. Move the slider right to increase (left to decrease) the amount that extends past the edge of your paper. The second position from the right works best for most cases.
- Click OK to complete setup.
3. Epson
- Open "Printing Preferences."
- On the "Main" tab, select the appropriate "Quality Option."
- Select "Sheet" or "Roll" as the Source setting.
- Check the "Borderless" box.
- Note: Once "Borderless" is selected, the "Borderless Expansion" slider will become available on the "Page Layout" tab. The slider allows you to adjust the amount your project will extend off the edge of the page.
- Select the "Type" from the drop-down that corresponds with your chosen paper type..
- Select the "Size" from the drop-down that corresponds with your chosen paper size.
- Click OK to close the Printer Driver Settings dialog box and apply your settings.
4. HP
- Navigate to your printer s "Properties" menu.
- On the "General" tab, click "Printing Preferences."
- From the "Printing Shortcuts" tab, select "Photo Printing-borderless" as your document type and select the appropriate response for the below options:
- Print quality: Normal, Best, or Max dpi
- Paper size: Select your chosen paper size for borderless printing.
- Paper type: Select your chosen paper type for borderless printing.
- Orientation: Portrait or Landscape
- If needed, and depending on your printer model, make changes to these options as well:
- HP digital photography options
- Advanced color settings
- Color management
- Grayscale quality
- Make any other necessary selections, then click OK to save your borderless print settings.
MAC
1. Brother
- Choose "Print" from the software you are using to open the "Print Dialog" window.
- In the "Print Dialog" window, select "[Paper Size] (borderless)" as your "Paper Size."
- Select "Scale to Fit" ? "Fill Entire Paper."
- Click "Print."
2. Canon
- In the "Print Dialog" window, select "[Paper Size] (borderless)" as your "Paper Size."
- Select "Borderless Printing" from the pop-up menu.
- Use the slider to adjust the amount of extension. Move the slider right to increase (left to decrease) the amount that extends past the edge of your paper. The second position from the right works best for most cases.
- Click "Print" to complete setup and print your project.
3. Epson
- Access the "Page Setup" dialog.
- Make a selection from the "Paper Size" drop-down.
- Select your "Paper Source."
- Check the "Borderless" box.
- Note: Once the "Borderless" option is selected, the "Expansion" slider becomes available and allows you to adjust how much of your image extends beyond the edge of the paper.
- Click OK to save your settings.
- Open the "Print Dialog" box.
- Select the paper you will be using as your "Media Type."
- Click "Print" to begin printing.
4. HP
- Open the "Print Dialog" window.
- If available, click "Show Details."
- Select your printer from the "Printer" menu.
- From the untitled drop-down menu below the "Pages" options, select "Layout," then select "None" from the "Border" menu.
- Save these settings for next time by clicking on the "Presets" menu and selecting "Save Current Settings as Preset."
**************************************************************************************************
In the end, as long as you have a printer that can get the job done, designing with MyCreativeShop and printing your own borderless marketing materials is a snap. If your printer isn t up to the task, MyCreativeShop s print service has got you covered, so start customizing today!